How to Pinstripe By Ray "el Vago" Smith
I am assuming that most of you have had some experience (good or bad) with a Mack striper and 1-Shot
paint. If you have, then you have some idea of how to hold a brush (a long topic that is of questionable
value) and how to get the proper consistency of the paint. I will dwell briefly on this as there are some variables that you may or may not know.
The quality of the pix may not be the greatest as I was taking them
myself. Don't ask; it was 1 AM and I didn't want to wake my wife. Normally when I do designs I use both hands but for this I had to use my other hand to hold the camera and also to show clarity.
So here goes nothing:
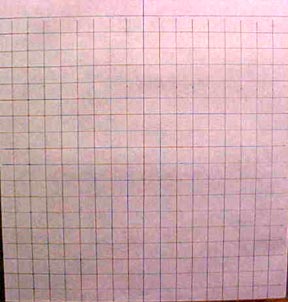 |
I took a piece of butcher paper and laid out a grid of 1" squares to use as a spacing
guide. As I am going to be doing this design on a piece of gray Lexan, you have only to center the piece over the
grid. In this case, I drew the center line higher than the rest to make locating it easier.
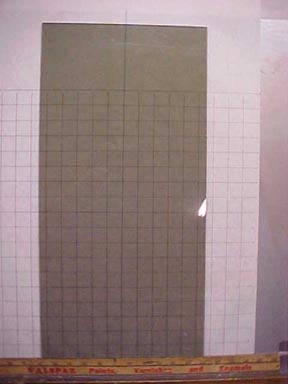
If you were doing this on a piece of metal or some other solid material,
you can lay out the grid directly on the material with a Stabilo pencil.
You can paint right over it (the adhesion of the paint isn't affected) and wash off the rest with water when the paint is dry. |
|
The Lexan is laid in place. If you don't have enough contrast, you
can lay out a grid on the reverse side of the Lexan. |
 |
 |
Before I start on this one, there are a couple things I need to say:
First; most of the designs I do have a couple things in common: they almost always start with a teardrop shape in the
center a good eye reference) and most of the designs have a vaguely triangular
shape that is a point at the top with the design gradually spreading out as it moves
downward. It has something to do with an architectural principle Greek?)that makes that shape pleasing to look
at. The disadvantage of it is that it's easier to lean in a freshly painted line!
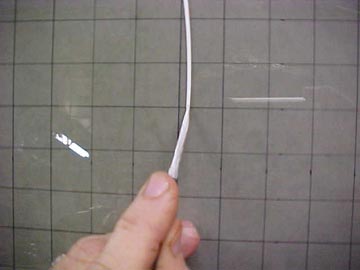
Anyway as I am left-handed I make my first line on the right side of the center
line. This makes it easier to see where I am going with the corresponding line on the other side. |
| The other side. |
 |
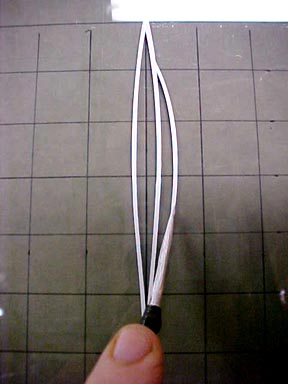 |
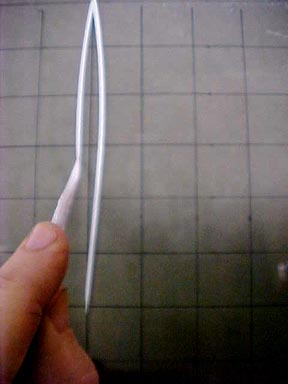
I make another line a little further from the first. Also
I would like to say that one thing that new stripers do that makes things difficult for them
is: they will make a starting loop and when they bring it back to the center try and bring it together at a very wide
angle. This makes it almost impossible to bring the two lines together without crossing over too
far. When you bring your lines together, do it at a very narrow angle and you will find they blend much
easier note how the first loop comes together). |
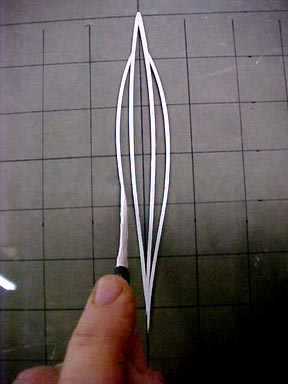
| Again the design is brought together at the center. |
 |
Next Page
Want to learn more or share your work with others?
Join
our pinstriperspage e-group Click here!
Need Brushes and
Supplies? Click Here!
Copyright
© 2004 @utomated Entertainment All
Rights Reserved Hosted by Webmeister "Moldy Marvin"