How to Pinstripe By Ray "el Vago" Smith  Page 3


I'm adding a few more lines to fill in the design a bit. Not too many because we're going to add a second color.

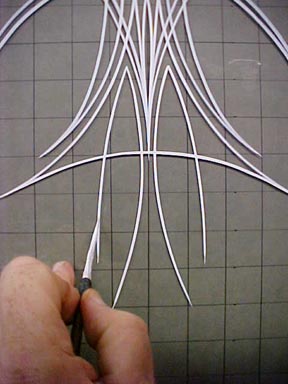
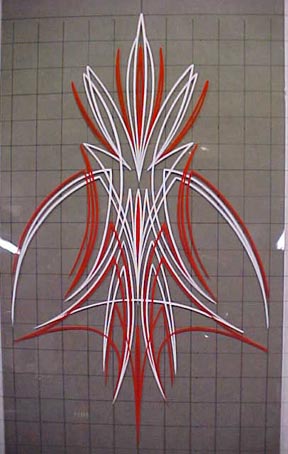
This shows the completed first color design. You could leave it like that or you could add a 
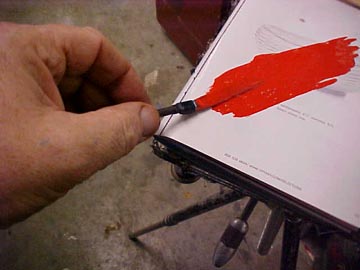
second or even third) color. The second color I will be using is Fire Red only because it provides a pretty good contrast for the white against the gray. Color selection is a whole other ball game which I'm not going to get into here. 


Anyway we've let the design dry I didn't but I was in a hurry to get this done) and we're ready to add another color.
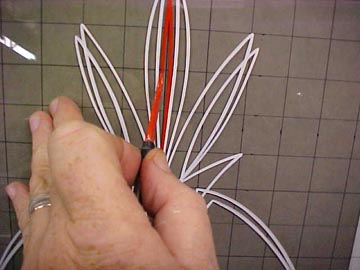
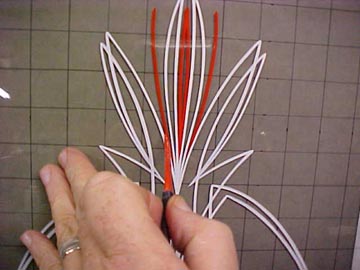
What I will say about this is: the less second color you add the better. Whenever you add a new color in you want it to complement the design not contrast with it. I've probably added more than I should have but it's my panel and I can do what I want with it!


I guess now is as good a time as any to say something about paletting. If you are doing a design or a work that doesn't require a long line in it, the paint should be slightly thicker than if you are pulling a line down the length of a car.


I take a brushful of paint and lay it on the palette a glossy junk mail catalog that my wife gets hundreds of daily.BTW don't use these if you're using HOK paints because the thinners will eat the ink right off the paper and contaminate your paint) an dip the brush in some thinner either mineral spirits or 1-Shot reducer) and work the brush back and forth through the paint alternating from one side of the brush to the other. I repeat this process until I feel the brush slipping through the mixture smoothly. Then I check the point of the brush to make sure it's nice and thin. If the point looks like it's swelled up a bit, the paint is too thin and will spread out and make a ragged line. Add more paint and re-palette until it's nice and sharp. It's then ready to work.
A couple of do's and don'ts: Always try and work in the shade and out of the breeze. Both will adversely affect paint consistency. They will prematurely dry the paint on the brush and force you to re-palette more. Always try to get in a comfortable position when striping. That can be difficult sometimes but it's amazing how much less your hand shakes when you're comfortable. If you don't believe me, try pulling a line while standing on your tiptoes! If you can do it, you're a better man than I Charlie Brown!

I add a little red into the design trying to keep it as simple as possible.


The finished product!

I know this is by no means a complete guide to striping but rather the way I go about doing a design.

Back To Page One!

Want to learn more or share your work with others?

Join our pinstriperspage e-group Click here! 

Need Brushes and Supplies? Click Here!


Copyright © 2004 @utomated Entertainment All Rights Reserved Hosted by Webmeister "Moldy Marvin"